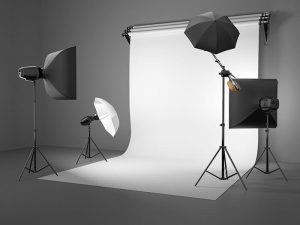
Because of the challenge of regulating the amount of natural light within a setting, and to avoid over lit pictures, a lot of camera enthusiasts opt for studio shooting. Shooting quality images in the studio is all about having the basic knowledge on a studio set up, camera, lighting accessories and techniques. Let us begin with the basic lighting set.
-
Set up your camera lights
To get you begin on the right footing, your photography studio should have the main, fill and rim light.
The Main light: is the most powerful light. It is responsible for the definition and highlighting the subject. This type of light is mostly set up behind or to the side of the camera.
Fill Light: When compared to the main light, fill light uses less power. The Fill light fills the camera subject shadows without necessarily distorting the photo parts. When setting it up, it is important to ensure that it is positioned lower than the main light. To cast more shadows on your subject, reduce the intensity of the fill shadow. Lastly, the fill light must at all times be less powerful than the main light.
Rim Light: Also known as the Backlight plays the delicate role of separating the subject from the background thereby elevating the outlook of the camera subject. Depending on the desired effect, the Rim light can be placed above or below the camera subject. Furthermore, the Rim light is an optional light that can be avoided in situations where the camera man wants the camera subject to blend with the background.
In case you don’t have the rim, fill and main light you can adjust your studio windows to incorporate more natural light. The Studio wall and ceiling can also be used as light reflectors of the natural light.
-
After setting up the camera lights, it’s important to test the set up
this can be done by moving your lights in different angles and directions until you get the right fit. With a studio assistant to support you, the search for the right camera light angles will be minimal.
-
Check your Flash
studio lighting is sometimes affected by wrong camera flash setting. To distance yourself from such happenings, ensure that your flash is not exceeding its flash power.
Conclusion
One of the hallmarks of a quality studio is quality lighting equipment and techniques. Instead of starting from a point of ignorance, use the above basic tips to get your studio up and running.


